

Abrasive Sponge Factory: The Complete Guide to Production, Materials, and Quality
2026-10-16
When an abrasive sponge underperforms, the culprit is rarely obvious—grit bonding, foam density, or resin choice can all quietly shift results. That’s where a closer look at production, materials, and quality control separates reliable suppliers from the rest. In this guide, we break down what actually matters inside an abrasive sponge factory, from raw material selection to final inspection. Along the way, you’ll see how SHENZHEN SUN ABRASIVES applies these principles to keep batches consistent and performance predictable.
The Polymer and Grit Blend Behind Long-Lasting Abrasive Foam
What makes an abrasive foam survive hundreds of scrubbing cycles without crumbling isn't a single ingredient—it's the deliberate marriage of a resilient polymer matrix and a carefully graded grit. The polymer acts like a flexible skeleton: it absorbs pressure, springs back after repeated compression, and keeps the abrasive particles locked in place instead of letting them flake away. Without that elastic backbone, even the hardest grit would turn to dust within a few uses.
The grit itself is rarely uniform. A blend of coarse, mid-size, and fine particles creates cutting peaks that wear down at different rates. As the larger grains slowly erode, smaller ones underneath take over, exposing fresh edges rather than leaving a smooth, useless surface. This layered shedding is what separates a foam that stays toothy for months from one that feels slick after a week.
Getting the ratio right matters more than raw hardness. Too much grit makes the foam brittle and prone to cracking; too little leaves it gliding over dirt without biting. The best blends tune polymer elasticity to grit concentration so the foam flexes just enough under hand pressure to keep maximum abrasive contact, extending the working life without sacrificing speed.
Inside the Wet Casting and Curing Stages That Lock in Grit
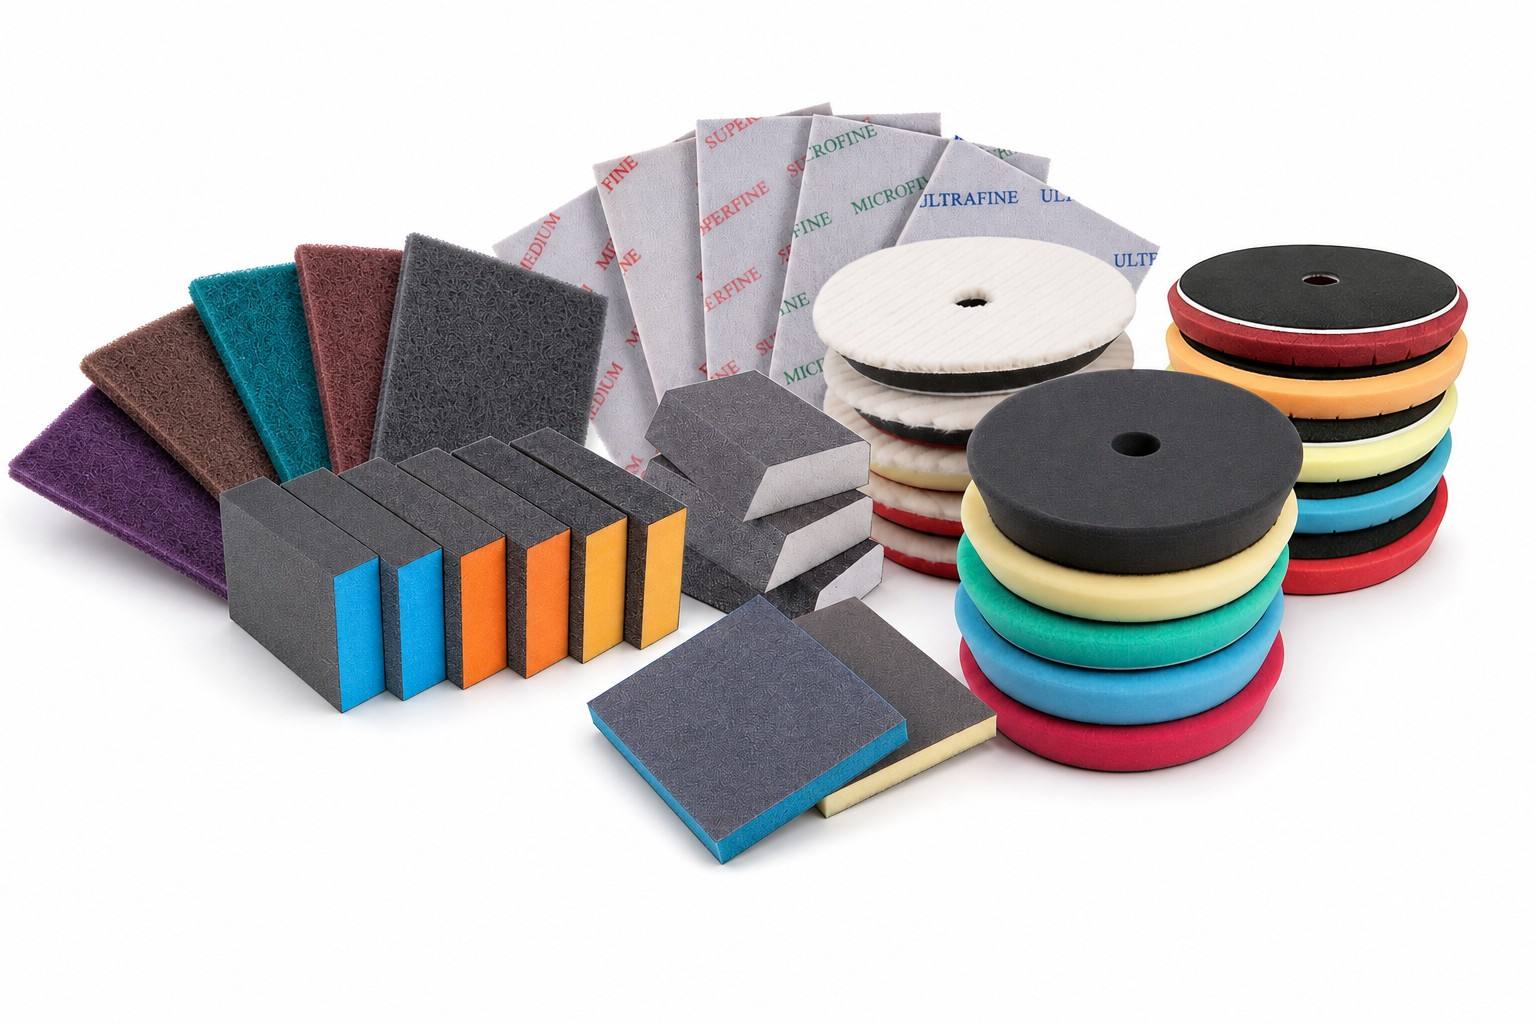
The wet casting process starts with a slurry dense enough to suspend abrasive particles evenly, rather than letting them sink into a useless layer. As the mold fills, the water acts as a temporary carrier, but the real work begins when the excess moisture is drawn out through controlled capillary action. This is where the grit gets locked into the matrix—not just trapped, but mechanically keyed into the surrounding binder as it transitions from fluid to a gel-like state.
Curing then becomes a slow dance of temperature and humidity. If you rush the water out too fast, the surface skin hardens prematurely and traps voids beneath; too slow, and the abrasive particles settle or migrate, leaving dead zones with no cutting power. The optimal cure profile holds the casting in a narrow window where hydration products grow into the spaces between each grit particle, creating a compressive grip that resists pull-out under load.
What separates a durable grit-locked surface from a merely bonded one is the residual stress pattern left after final drying. A well-cured casting develops micro-cracks that stop at the abrasive boundaries, effectively using the grit as crack arrestors. This means the abrasive doesn't just sit in the matrix—it actively reinforces the whole structure while staying sharp at the exposed tips.
Why Grit Number Is Only Half the Story for Final Finish
A polished surface can still hide microscopic scratches, uneven material density, or subtle tool marks that only become visible under certain lighting or after wear. The grit number tells you the abrasive particle size, but it doesn't account for how evenly those particles break down during sanding, whether the backing pad flexes consistently, or how heat and pressure alter the scratch pattern. Two discs with the same grit rating can leave dramatically different finishes simply because one sheds abrasive grains more uniformly while the other clogs and skips.
Final finish depends just as much on the sequence of steps before the last grit. Skipping an intermediate grade might save time, but the deeper scratches it leaves behind won't fully disappear no matter how fine the final paper is. The material itself also matters: soft woods, hard coatings, and composites respond differently to identical grit numbers. A 320-grit finish on oak can look and feel rougher than a 240-grit finish on maple if the sanding motion, speed, and pressure aren't adjusted to the workpiece.
What really determines the end result is the combination of abrasive type, backing stiffness, and operator technique. Ceramic or zirconia grains cut differently than aluminum oxide even at the same grit size. A stiff backing transfers more pressure to the high spots, while a soft pad follows contours and can round over edges. Until you factor in these variables, the grit number is just a starting point, not a guarantee of surface quality.
Batch Testing Methods for Bond Strength and Edge Wear
Batch testing for bond strength typically involves pulling a set of prepared specimens from each production lot. Instead of testing every unit, a statistically justified sample size is selected, often following internal quality protocols or ISO/ASTM guides. The key is to capture lot-to-lot variation without excessive destructive testing. Common methods include single-lap shear, pull-off, or peel tests, depending on the bonded assembly. Specimens are conditioned to match service environment, and fixtures must be aligned to avoid introducing bending stresses that skew results.
Edge wear is trickier because it accumulates over time and depends on contact geometry, abrasives, and load. For batch-level screening, accelerated wear rigs can rank materials or surface treatments within hours. A batch typically includes reference coupons with known wear rates, so each test run can be normalized against drift in abrasion media or temperature. Measurements might use tactile profilometry across the worn edge, or optical microscopy for chipping and micro-fracture. Reporting should include both average wear depth and the spread of individual measurements, since edge failure often starts from a single weak spot rather than uniform degradation.
Combining bond strength and edge wear in one batch release decision requires setting clear pass/fail thresholds that reflect end-use requirements. For example, a lot might be accepted if the mean bond strength exceeds a minimum value and no specimen falls below a lower individual limit, while edge wear stays within a defined band after a fixed number of cycles. When a batch fails, the test data should guide root cause analysis—whether the issue traces to surface preparation, adhesive mixing, coating thickness, or substrate hardness. Periodic re-validation of the test methods themselves helps ensure the batch results remain predictive of field performance.
Matching Foam Hardness to Pressure, Surface, and Tool Type
Foam hardness plays a direct role in how pressure moves from the machine to the surface. Softer foams compress more under load, which spreads the operator's pressure across a wider contact patch and helps the pad follow gentle curves. Harder foams resist compression, so they keep the face flatter and deliver more focused pressure to the top of the surface texture. Choosing the right firmness means matching how much give you want against how much cutting or finishing action the job needs.
The surface itself also dictates the sensible foam choice. On textured or aged finishes with deeper defects, a firmer foam prevents the pad from sinking into valleys and keeps the abrasive working on the peaks where correction happens. By contrast, soft or heat-sensitive paints, fresh clearcoats, and contoured panels respond better to a softer pad that reduces localized stress and the chance of burning through edges.
Tool type changes the equation again. A rotary polisher builds heat quickly and benefits from a slightly softer foam to manage friction on delicate areas. Dual-action machines, which rely on oscillation rather than forced rotation, tolerate firmer foams because the motion is less aggressive and heat stays lower. Matching foam hardness to the tool and your working pressure keeps the process predictable, reduces pad skipping, and extends the life of both the pad and the abrasive.
Spotting Inconsistent Pores, Patchy Grit, and Weak Bonds
Inconsistent pores rarely show up as a single flaw. You will notice them first as a scatter of tiny voids that differ in size and spacing from one patch to the next. Run your fingertips over the surface after a light dusting of talc, and the texture will feel uneven, almost like the material is breathing through mismatched holes. Under a low-angle light, these pores cast irregular shadows that jump from shallow to deep, a sure sign that the pore-forming process drifted during curing or compaction.
Patchy grit is another telltale sign that something in the bonding layer has gone wrong. Instead of a fine, uniform abrasive bed, you will see islands of concentrated particles surrounded by smoother, bare zones. Drag a fingernail across these areas and the resistance changes abruptly, almost as though the surface has forgotten its own recipe. Sometimes the grit clumps into tiny ridges that catch the light, giving the material a mottled, dusty look that cannot be wiped clean.
Weak bonds are the quiet failure hiding behind the other two. When pores are inconsistent and grit is patchy, the adhesive matrix rarely holds under lateral stress. Press the edge of a coin against one of the suspect zones and twist gently; a properly bonded surface will resist with a faint squeak, while a weak one will crumble or flake away with little effort. If you see loose grains gathering in the corners of nearby joints or along the edges of the sample, the bond has already begun to fail invisibly from within.
FAQ
Most factories combine a flexible polyurethane or polyester foam base with abrasive grains like aluminum oxide, silicon carbide, or ceramic alumina. The bonding system usually involves a phenolic or epoxy resin, and some lines add a reinforcing mesh to stabilize the sponge during cutting and use.
Grit is applied through an electrostatic coating process that aligns the sharp edges outward, then a second pass deposits a lighter size coat to lock the grains in place. Operators regularly sample the coated sheets and use a digital microscope to check for bare patches or excessive clumping before the resin is fully cured.
The process typically starts with foam block slicing, followed by adhesive priming, abrasive coating, and curing in a multi-zone oven. After cooling, the sheets are flexed to prevent brittleness, then die-cut into pads or blocks, edge-sealed if needed, and packed into retail or bulk cartons.
A thin, flexible adhesive film or sprayable polyurethane glue is applied to the foam surface under controlled humidity. The abrasive-coated backing is then pressed onto the foam with a roller system that maintains even pressure, and the assembly is left to cure for several hours so the bond can survive repeated wet and dry cycles.
Samples from each batch undergo a peel test to measure bond strength, a grit-loss test using a standard scrub machine, and a water-soak test to ensure the foam does not break down. Thickness and density are checked with a durometer, and finished pads are visually inspected for edge tearing or uneven coating.
Yes, most lines can switch between grit ranges from extra coarse to ultra fine by changing the abrasive hopper and adjusting the electrostatic voltage. Foam density is selected from pre-molded blocks, so a factory can produce soft pads for delicate surfaces or firm sponges for heavy scrubbing simply by changing the base material feed.
After the resin is fully cured, the coated sheets pass through a flexing station that repeatedly bends them over small rollers to create micro-cracks in the resin without damaging the foam. This makes the abrasive layer more flexible and prevents it from snapping or shedding large chunks during hand use.
Many factories now recover solvent vapors from the coating line and reuse foam offcuts by shredding them into rebonded filler blocks. Water-based resins are increasingly replacing solvent-based ones, and scrap abrasive grains are collected through dust extraction systems so they can be sieved and blended back into lower-grade products.
Conclusion
In a working abrasive sponge plant, the real story starts long before any grit touches a finishing line. The polymer base and abrasive grain aren’t just mixed; they’re matched for bond tenacity and flex fatigue. Wet casting then sets the stage, but it’s the controlled cure that locks grit into the foam cell walls rather than leaving it as a surface dusting. A high grit number alone tells you little—two sponges marked 320 can behave completely differently depending on grain shape, dispersion, and how the foam rebounds under load. That’s why batch testing focuses on bond strength and edge wear under simulated use, not just a quick grit count.
Down on the line, hardness gets dialed in for the actual job: soft foam for contoured hand sanding, firmer stock for machine pads or high-pressure work. The best inspectors don’t just glance at color; they flex a corner, tear a sample, and check for uneven pore size, grit clustering, or weak spots where the abrasive layer peels away. A sponge that looks uniform on the shelf can still fail after twenty strokes if the cure was rushed or the mix sat too long. Getting production right means treating every batch as a physical system—polymer, grit, water, heat, and time—not a recipe to be blindly repeated.
Contact Us
Contact Person: Amanda Wang
Email: [email protected]
Tel/WhatsApp: +86-13602569854
Website: https://www.sunabrasives.com.cn