

Best Solar Wall Light Choices for a Brighter Outdoor Space
2026-08-21
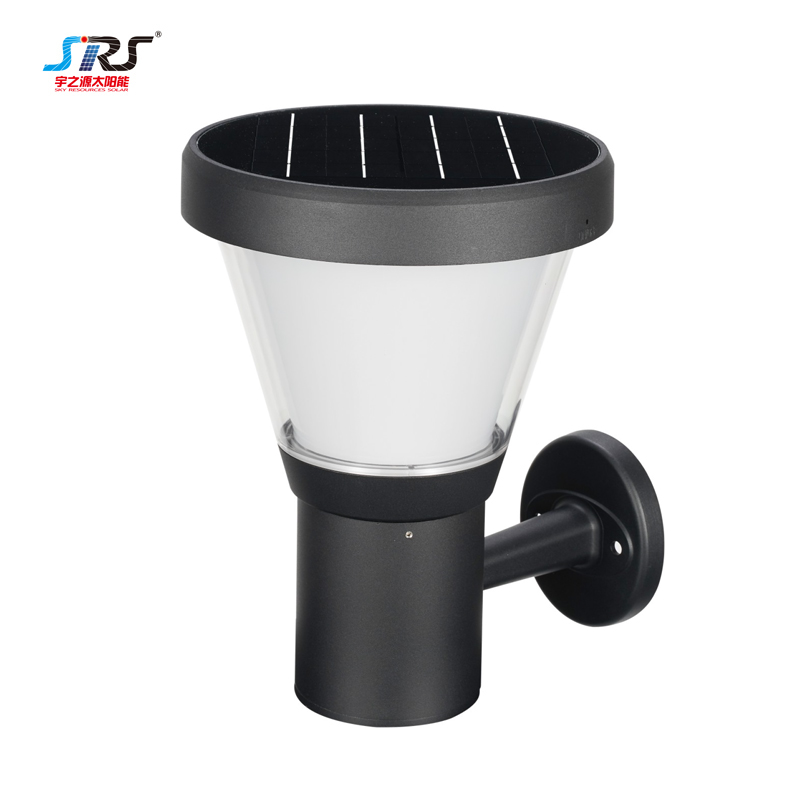
When evening falls and your outdoor walls disappear into darkness, a well-chosen solar wall light can completely change the mood. Yet the market is flooded with mediocre options that promise glow but deliver gloom. That's where SRS comes in. From sleek modern finishes to rugged weatherproof builds, this guide walks you through standout choices that actually earn their place on your wall. Ready to find a light that does more than just switch on after sunset? Keep reading—the best picks are just ahead.
Can a Solar Wall Light Really Brighten a Dark Patio?
The short answer is yes, but only if you pick the right one. A standard solar wall light with a tiny panel and a few weak LEDs won't do much for a patio that's truly dark. You need a model with a high-lumen output—think at least 200 lumens for a small seating area, and more if you want to light up a larger space. Look for lights that use lithium-ion batteries and have efficient monocrystalline panels; these store more energy during the day and release it steadily after sunset.
Placement matters just as much as brightness. A solar wall light only works if its panel gets direct sunlight for most of the day. If your patio is shaded by trees or a roof overhang, the light will start dim and fade quickly. Mounting it on a south-facing wall or a spot that gets six to eight hours of sun makes a huge difference. Some newer models let you angle the panel separately from the light head, which helps in tricky spots.
Don't expect a solar wall light to flood the patio like a wired spotlight. What it does well is create a warm, focused pool of light near a wall or doorway—enough for safe navigation, reading a drink label, or setting a mood. For a truly dark patio, consider pairing two solar wall lights with a solar path light or a small solar lantern on a table. That layered approach brightens the space without relying on a single fixture to do all the work.
The Design Mistake Most People Make With Outdoor Lighting
Most people treat outdoor lighting as an afterthought—flip on a floodlight, add a couple of path stakes, and call it done. The result is a flat, glaring wash that erases depth and makes every corner feel like a security checkpoint. Instead of revealing the space, this approach flattens it. You lose the shadow lines from a tree canopy, the soft glow against a stone wall, and the subtle invitation of a lit pathway that guides without shouting.
The real issue usually comes down to one thing: thinking in terms of brightness rather than layers. A single intense source near the door or garage throws harsh shadows and creates blinding hotspots, while the rest of the yard falls into blackness. Practical lighting has its place, but when every fixture aims for maximum output, the outdoor room stops feeling like an extension of the home. Warm, low-level pools of light placed at different heights do more for both safety and atmosphere than any wall of lumens.
A better approach starts with choosing what not to light. Leave some areas in soft darkness, highlight a branch or textured surface, and let pathways follow gentle pools instead of runway-style lines. Use fixtures with shielding or downward-facing bulbs to control glare, and stick to a color temperature below 3000K so the space doesn't read as cold or institutional. Once you stop trying to banish the night, the design starts to breathe.
How to Choose a Solar Panel That Won't Quit in Winter
Most panels lose efficiency as they heat up, but winter actually works in your favor there — the cold keeps them running closer to peak output, provided they're built for low-light days. Look beyond the flashy efficiency number and check the temperature coefficient: a panel with a lower percentage per degree Celsius will squeeze more out of weak winter sun. Also pay attention to how it performs under overcast skies, because short December days mean you'll be relying on diffuse light more than direct rays.
Snow load and ice are the quiet killers of cheap panels. A sturdy aluminum frame with a high static load rating keeps the glass from flexing and cracking when wet snow piles up. Some modules have a slightly textured or hydrophobic coating that encourages snow to slide off instead of sitting there and blocking output for days. If you live somewhere with heavy accumulation, consider mounting at a steeper angle — not just for generation, but so the snow can't get a foothold.
Don't overlook cell technology. N-type cells, often found in higher-end panels, degrade more slowly and handle low-light conditions better than older P-type designs. Bifacial panels can actually gain a small boost in winter from sunlight reflecting off snow, which is a nice bonus if your roof or ground mount allows for it. And while microinverters or power optimizers won't change the panel itself, they prevent one shaded or snow-covered panel from dragging down the whole string — a detail that matters more in winter than any other season.
Wall Lights That Look Good in Daylight, Not Just at Night
Most wall lights are chosen for their glow after dark, but the best designs earn their place on the wall long before the sun sets. A fixture with sculptural lines, unexpected materials, or a finish that catches the light becomes a deliberate piece of decor during the day. Think of it as jewelry for the wall—something that reads as intentional rather than purely functional.
Daylight reveals details that vanish at night: the soft patina of aged brass, the subtle texture of hand-blown glass, the way a shade casts a geometric shadow on the plaster. When evaluating a wall light, turn it off and step back. Does it hold the wall with confidence? Does its shape complement the room's architecture rather than disappear into it? The most satisfying choices often have a quiet presence—an understated asymmetry or a warm metallic tone that shifts with the hour.
Color and material matter more in daylight. A matte black fixture can feel graphic against a white wall, while unlacquered brass warms as it oxidizes, telling a story over time. Linen shades diffuse bright afternoon sun into a soft glow, and ribbed glass adds a layer of depth that changes as you move around the room. The goal is a light that earns a second look at noon, not just after dinner.
Motion Sensors vs. Always-On: What Suits Your Routine?
Think about your daily flow. In high-traffic areas like hallways or kitchens, motion sensors can feel like a small luxury—lights flick on as you pass, no fumbling for switches. But they come with a quirk: a pause too long can leave you waving your arms like a conductor. For spaces where you linger, that on/off dance gets annoying fast.
Always-on setups trade that convenience for consistency. A porch light burning through the night eats a little more energy, but it never misreads your stillness in the living room. If your routine is predictable—say, you read on the couch for an hour—a steady glow beats a sensor that might decide you've gone.
The real answer is hybrid. Put motion sensors in pass-through zones and keep always-on where you settle. Your home shouldn't make you perform for it.
Under $50 vs. Over $100: Where the Real Differences Lie
At first glance, a $40 product and a $120 product might look nearly identical on a store shelf. The real differences usually show up after a few weeks of daily use. Cheaper options tend to cut corners on materials that aren't visible in product photos: thinner plastics, looser hinges, less durable coatings. That doesn't mean the budget pick is useless, but you're often paying for a shorter honeymoon period before small annoyances creep in.
Once you step above $100, the improvements are rarely about a single headlining feature. Instead, you get a cluster of quieter upgrades. Better heat dissipation, more consistent performance under load, replaceable parts, or a warranty that actually covers accidental damage. These aren't glamorous selling points, but they're what separate a device you replace every year from one you keep for five.
That said, the gap isn't linear. There are plenty of $60 products that outlast $130 ones because the brand spent money on one critical component rather than spreading it across cosmetic extras. The smart move is to look for the telltale signs of cost cutting: wobbly connectors, vague spec sheets, and reviews that all mention the same failure point after three months. If you can't find any of those red flags, the cheaper option might be the better buy.
FAQ
Check the panel size and battery capacity rather than just the lumen count. A larger monocrystalline panel and a replaceable 18650 or similar battery tend to keep things running through cloudy stretches. Also look for a warm color temperature around 2700K to 3000K if you want a cozy glow instead of harsh glare.
Yes, but you need to be realistic. Place the panel away from eaves and clean it occasionally. Models with separate or adjustable panels let you angle towards the sun even if the wall is north-facing. Some also have a low-power mode that stretches runtime during shorter days.
For a gentle marker light, 50 to 100 lumens is often enough. For actual task lighting near a door or steps, aim for 150 to 300 lumens. Don't obsess over the highest number because beam pattern and mounting height matter more for useful coverage.
Usually yes. Most solar wall lights need no wiring. You drill pilot holes, mount the bracket, and attach the fixture. The main gotcha is making sure the panel gets enough sun during the day, so avoid mounting under deep overhangs.
Look for dark bronze or matte black finishes with subtle details, like a slim cylindrical lantern or a half-moon sconce. Avoid bulky plastic housings with visible fake LEDs. Glass or textured lenses can also make the light feel more like a permanent fixture than a gadget.
Not much. Wipe the panel with a damp cloth every month or two, especially if you live near a road or under trees. Check for water inside the lens after heavy rain. If brightness drops after a couple of years, a fresh rechargeable battery often brings it back.
Choose models rated IP65 or higher, and they can stay out through rain and snow. For extreme hail or hurricane conditions, it doesn't hurt to bring them in, but everyday weather won't bother a decent metal or UV-stabilized plastic unit.
Cheap ones often use small solar panels and non-replaceable batteries that degrade fast. Also, if water seeps in or the panel is covered with dust, the battery never fully charges. Spending a bit more on a metal body with a replaceable battery usually pays off.
Conclusion
If you've ever wondered whether a solar wall light can genuinely transform a dark patio, the answer is yes—but only if you pick the right one. Too many people treat outdoor lighting as an afterthought, hanging a tiny fixture near the door and expecting it to wash the whole space. That's the design mistake that leaves most patios half-lit. Instead, think about light placement and spread: a well-positioned solar wall light can bounce brightness off walls or fences, making even a compact area feel open and safe. And don't ignore how the fixture looks in daylight. A bulky plastic box might glow fine at night, but it will cheapen your outdoor decor the moment the sun comes up.
When comparing options, pay close attention to the solar panel itself. A weak panel may work in summer but quit early in winter, so look for monocrystalline panels and batteries rated for cold weather. Also consider your daily routine: motion sensors save battery and add security with a sudden flood of light, while always-on models create a steady, welcoming glow—there's no universal best, just what fits how you use the space. Finally, the price gap between under-$50 and over-$100 lights isn't just about brand name. Higher-priced models usually offer better weather sealing, replaceable batteries, and warmer, more even light output. Under $50 can work for a small step or accent, but for a main patio area, spending a bit more often means the difference between a light that lasts two seasons and one that still looks great after several years.
Contact Us
Contact Person: kitty
Email: [email protected]
Tel/WhatsApp: +8618676039824
Website: https://www.srssolargroup.com/